
How to create and set Hideez Key Access Profiles
Hideez Enterprise Server – Creating and setting device access profiles
Profile settings explanation
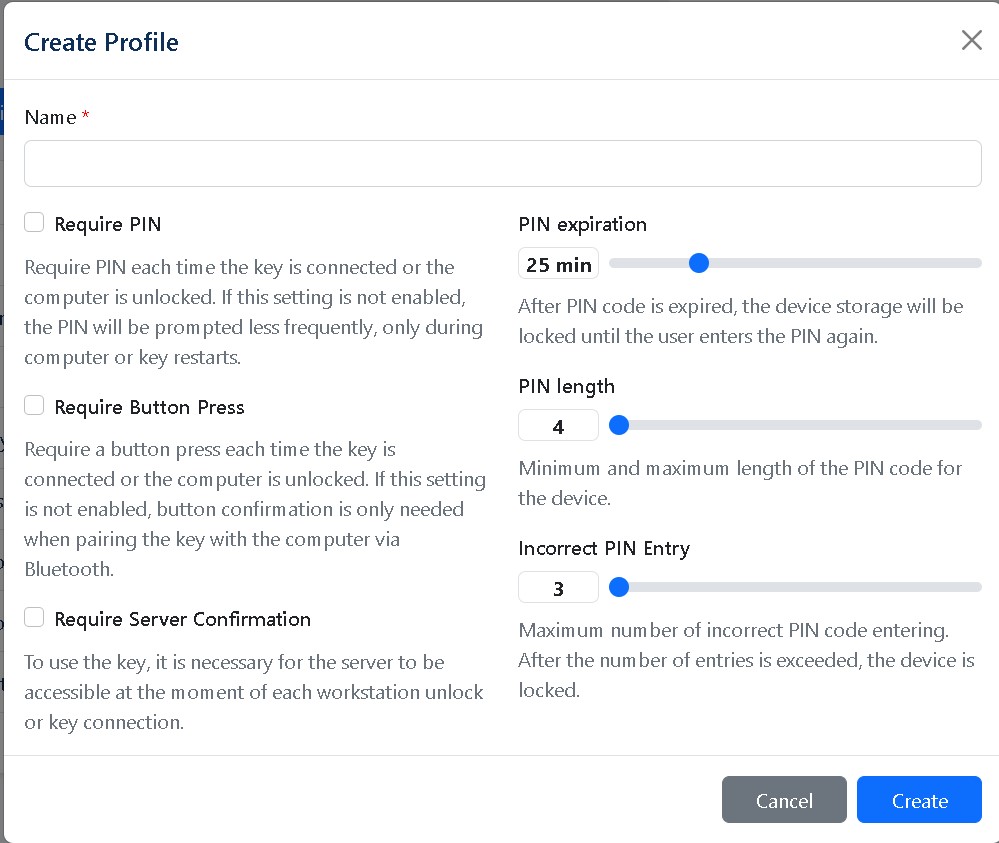
PIN
Require PIN: Require PIN each time the key is connected or the computer is unlocked. If this setting is not enabled, the PIN will be prompted less frequently, only during computer or key restarts.
PIN expiration: After the PIN code is expired, the device storage will be locked until the user enters the PIN again.
PIN length: Minimum and maximum length of the PIN code for the device.
Incorrect PIN Entry: Maximum number of incorrect PIN code entering. After the number of entries is exceeded, the device is locked.
Button Press
Require Button Press: Require a button press each time the key is connected or the computer is unlocked. If this setting is not enabled, button confirmation is only needed when pairing the key with the computer via Bluetooth.
Server Confirmation
Require Server Confirmation: To use the key, it is necessary for the server to be accessible at the moment of each workstation unlock or key connection.
Default Profile Settings
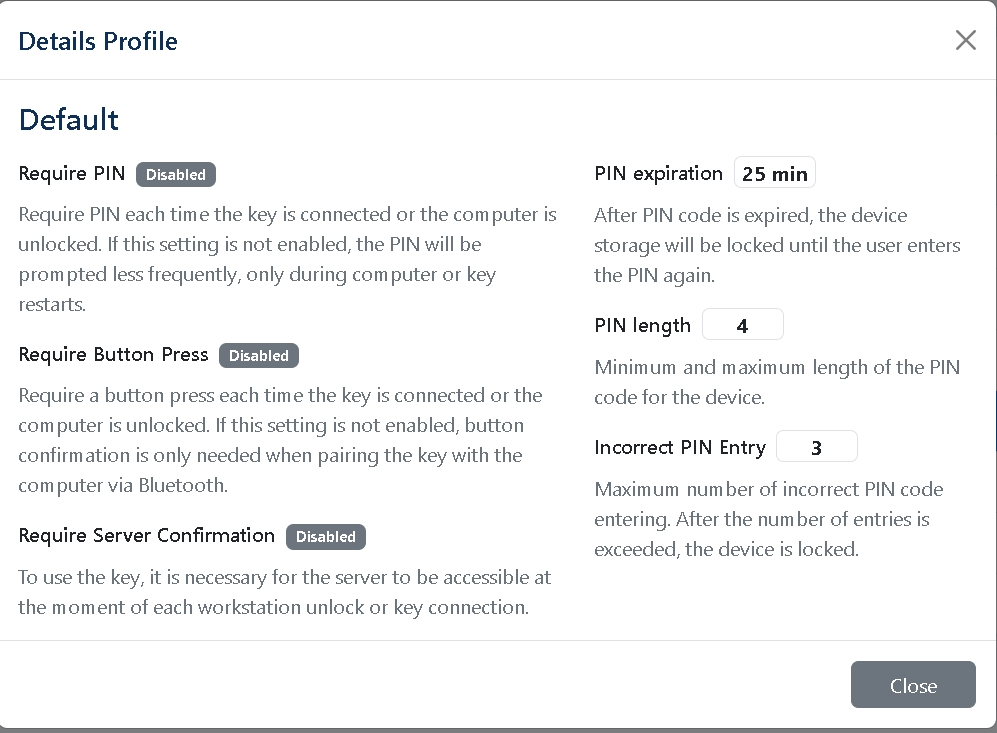
By default, all Employees have a Default Profile with such parameters:
Require PIN: Disabled
Require Button Press Disabled
Require Server Confirmation Disabled
Please note that during the activation of your Hideez Key, you will need to set up a PIN code. This PIN code will be used for authentication using the FIDO standard. Additionally, you will enter this PIN code each time you unlock your computer using the Hideez key for the first time after turning it on or restarting it.
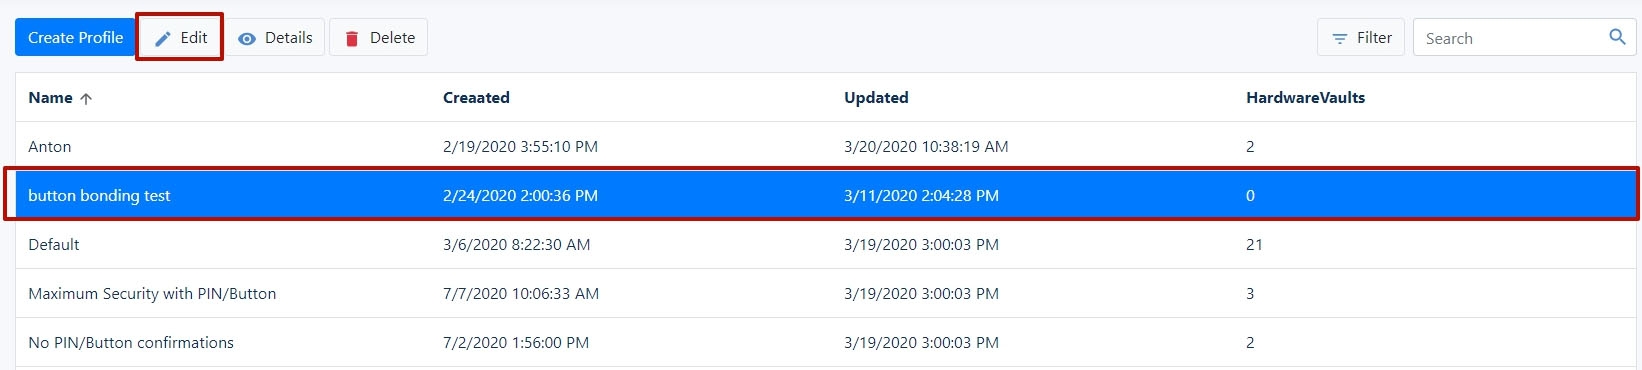
To configure profiles, go to the Hardware Vaults section, Access Profiles tab.

You can edit an existing profile, create a new one, and delete it.
Do not forget to set the desired profile to the Hideez Key.
Edit an existing profile
Step 1
To edit an existing one, you need to select a profile by clicking on it and then click Edit.
Step 2
Make all needed changes and click Save.
Create a new profile
Step 1
To create a new one, click the Create Profile.

Step 2
Make all needed settings and click Create. Read about Profile Settings.
Delete profile
Step 1
To delete an existing one, you need to select a profile by clicking on it and then click Delete.

Step 2
Approve action by clicking Delete.
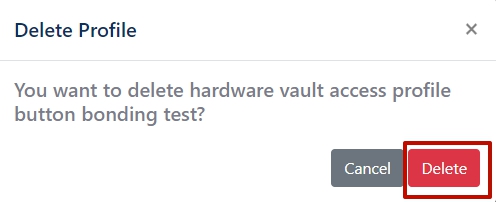
You can delete only Profiles that are not in use by Hardware Vaults. Otherwise, you need to first assign other profiles to the hardware vaults.
Set a profile for the device
For the created profile to work, it must be assigned to the device.
When an administrator changes profile settings, remote tasks are created to change these settings on each affected device. These tasks will be completed as soon as the device is connected.
Was this helpful?